Setting Up Pi-hole on My Proxmox Server, A Fun and Useful Project
Today, I woke up very early — around 3 a.m. I couldn’t go back to sleep, so I decided to learn something new and productive. I opened YouTube and came across a tutorial on how to install Pi-hole on a Proxmox server. I’ve always wanted to block ads on my network and use custom domain names instead of typing long IP addresses, so I thought this would be the perfect time to try it.
If you’re not familiar with it, Pi-hole is a network-wide ad blocker that works as a DNS (Domain Name System) server. Instead of sending DNS requests to your internet service provider (ISP) or another public DNS, your devices will send those requests to Pi-hole first. Pi-hole filters out any domains that serve ads or trackers, making your internet experience faster, cleaner, and more private.
My Setup
I’m running Proxmox, which is a powerful virtualization platform that allows you to create and manage virtual machines and containers. It’s perfect for running small services like Pi-hole. In my setup, I now have:
- One container running a web server (for my personal projects and websites).
- Another container running Pi-hole, which acts as my DNS server.
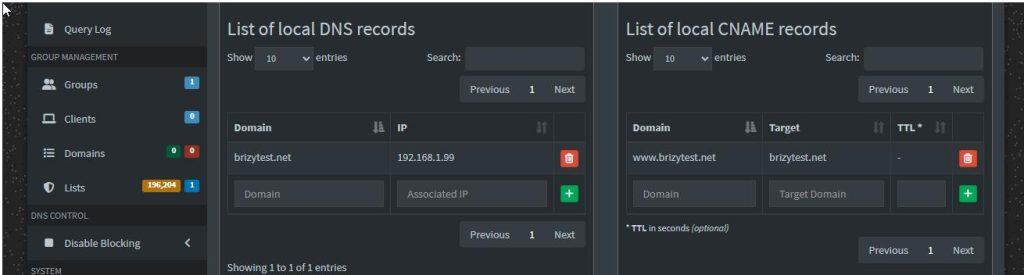
This allows me to host websites locally and access them using custom domain names (like mywebsite.local) instead of typing the server’s IP address. Much easier and cleaner!
Installation Steps
The installation was faster and easier than I expected. Here’s what I did:
- Created a new container in Proxmox and installed Ubuntu Server on it.
- Once Ubuntu was up and running, I used the one-line curl command provided by Pi-hole’s official documentation to install the software. This is the quickest and simplest method.
- After installation, there was no need for extra configuration.
- I assigned a static IP address to the Pi-hole container.
- Finally, I changed the DNS settings on my router (you can also change it on each device if preferred) to point to the Pi-hole’s static IP.
Just like that, Pi-hole was up and running!
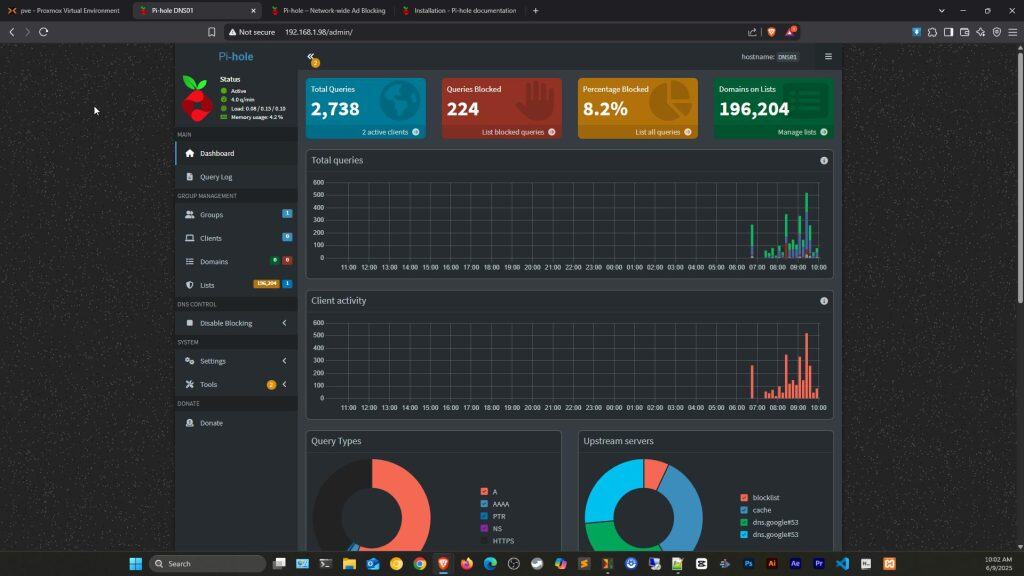
The Results
I checked the Pi-hole dashboard, and to my surprise, it had already blocked 224 DNS queries. That’s a lot of ads and trackers I no longer see while browsing! I also noticed that some websites load a bit faster now. This makes sense, because Pi-hole blocks connections to many advertising and tracking servers, reducing the number of external requests your browser needs to make.
Final Thoughts
Setting up Pi-hole was a fun and satisfying project. It’s always exciting to learn new things, especially when they improve your internet experience. If you’re running a home lab or using Proxmox like I am, I highly recommend giving Pi-hole a try. It’s lightweight, easy to install, and very useful for anyone who values privacy and speed online.
Let me know in the comments if you’ve tried Pi-hole or plan to, I’d love to hear how it went for you!
Leave a Reply